
How to Weave a Potholder Leave a comment
Did you discover ways to weave a potholder once you had been a child, with these colourful polyester loops on a easy little loom? Effectively, potholder weavings have come a good distance. They’re nonetheless straightforward to make, however with all of the choices for loops today, they’re means cuter.
Final time I talked about these form of weavings on a potholder loom, I went via the historical past of potholder weavings, all of the ends of outs of what you would want to get began, the assorted kinds of looms accessible, and so on. However right this moment, I needed to share the right way to really make a potholder weaving from considered one of these cheap looms.
I taught a few lessons on this very topic to elementary faculty children not too long ago (age 4-12) they usually had been capable of grasp the idea fairly rapidly. So you already know the method will probably be easy-to-follow. However extra importantly, it’s enjoyable, solely requires two objects to get began, and you’ll have a accomplished potholder weaving in lower than an hour. It’s addictive, I promise!
So, for those who’re in search of a solution to maintain your palms busy and check out a special inventive exercise, or only a mission to zone out on whereas watching television, click on via for the tutorial.

Supplies for Making a Potholder
I not too long ago discovered an enormous bag of loopers on Amazon for below $20. And for the value, it can’t be beat, imo. Can be an effective way to get began with potholder weaving with out investing a lot cash.
One other factor I like about these cheap loops is there are any colours that you simply’re not keen on, since it’s a blended bag of colours, you possibly can dye the loops fairly simply. I’ll present you the way to do this on this submit as effectively.

The best way to Make a Potholder
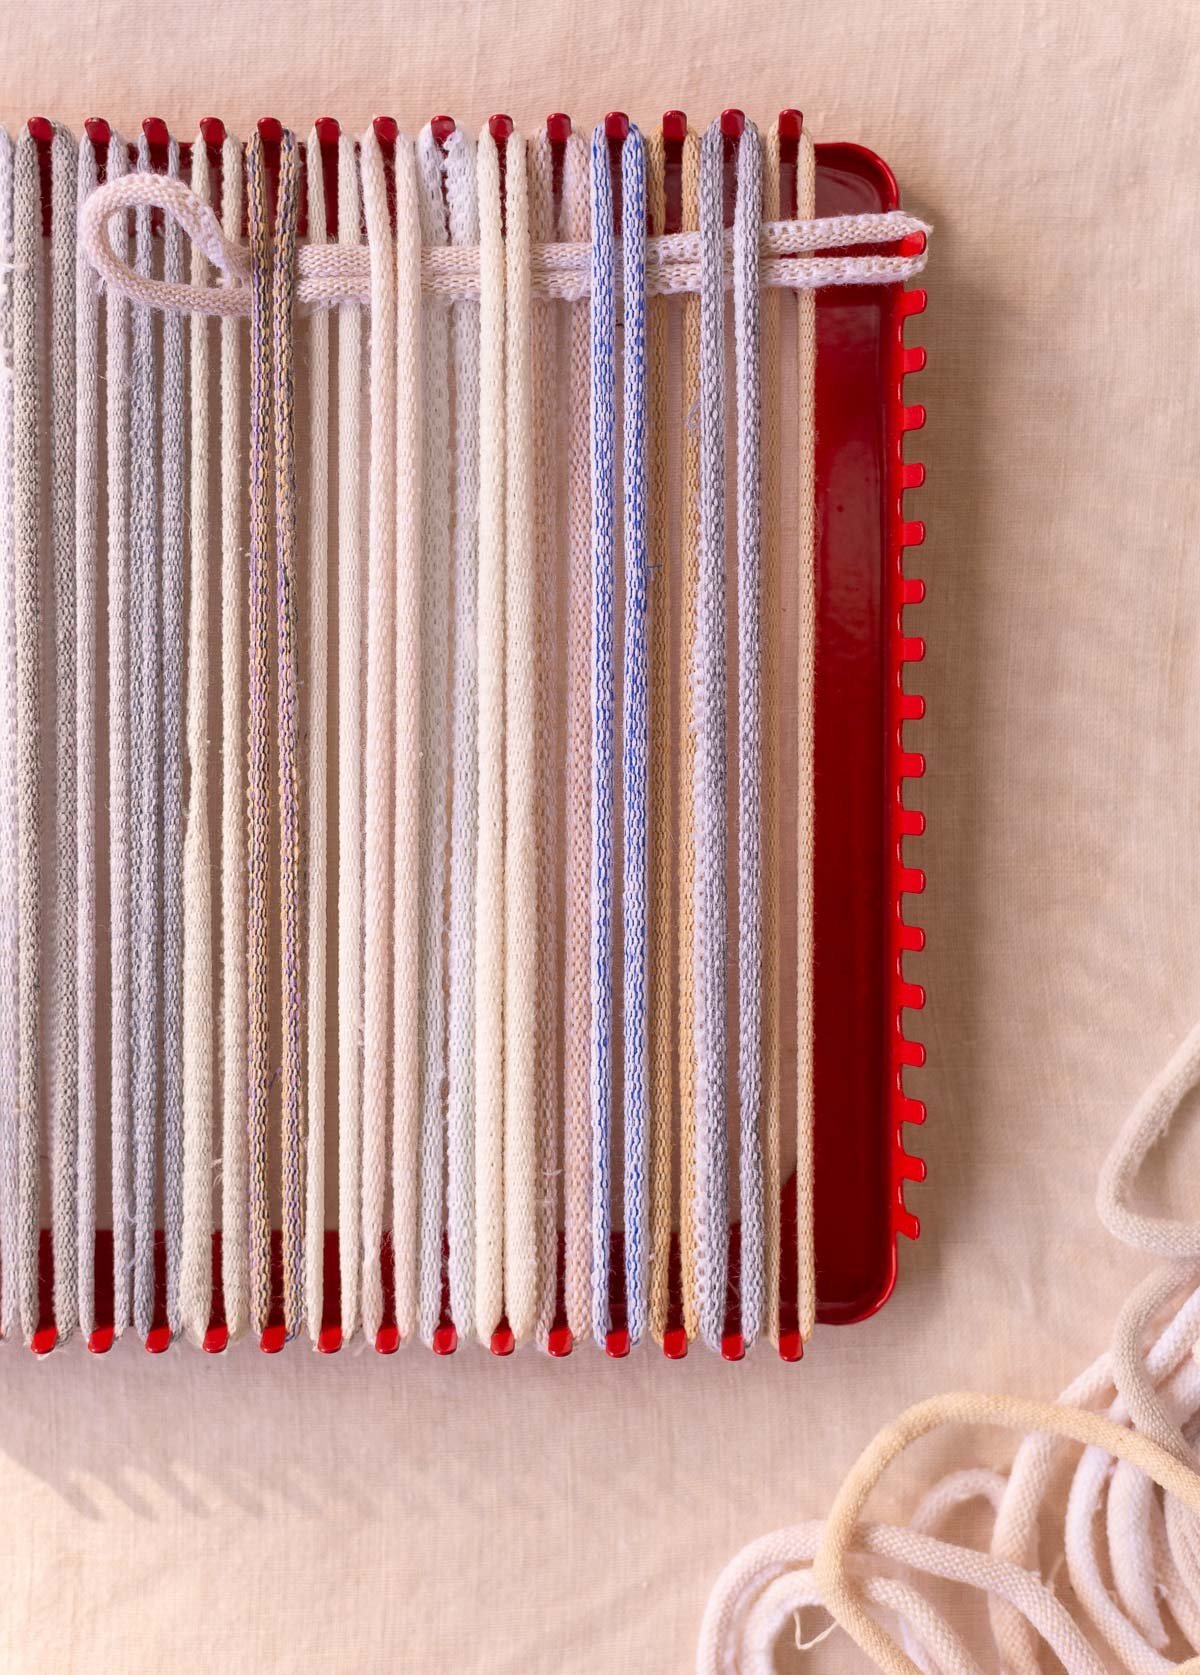
1. Stringing the warp.
Slip your first loop over the primary peg on the prime left and stretch it down, vertically, to the primary peg on the underside (backside left) of the loom.
Repeat this course of all the way in which throughout the loom, ensuring there may be one loop for each set of pegs. And that every one the loops run parallel to one another.
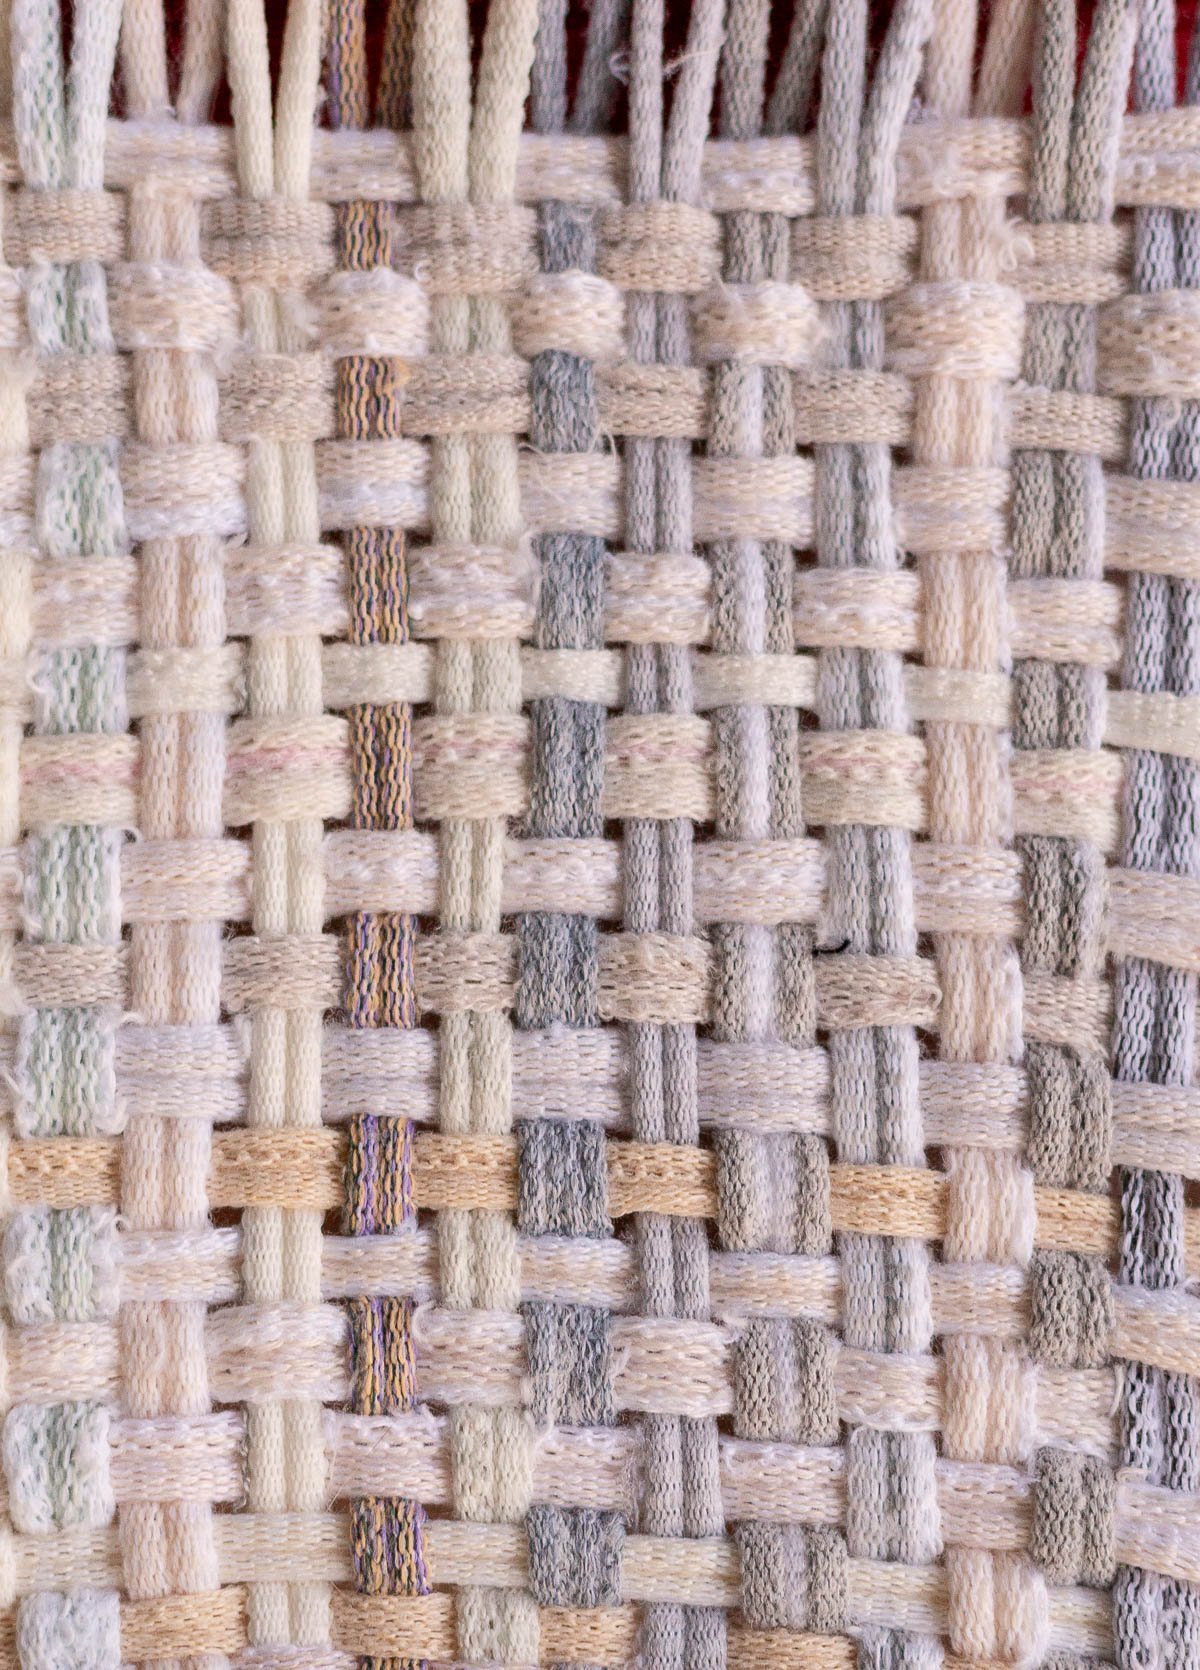
2. Weaving the weft.
Subsequent you’ll create the horizontal a part of the weaving. It is a good time to modify colours if you wish to create a sample.
Begin by attaching a brand new loop to the highest horizontal peg (on both the left or proper facet) and go over the primary vertical loop and below the subsequent. Then over the subsequent loop and below the one after that.
Sustain with this course of till your loop reaches the tip of the row. Then, connect the tip of the loop to the peg. And also you’re prepared to begin your subsequent loop.

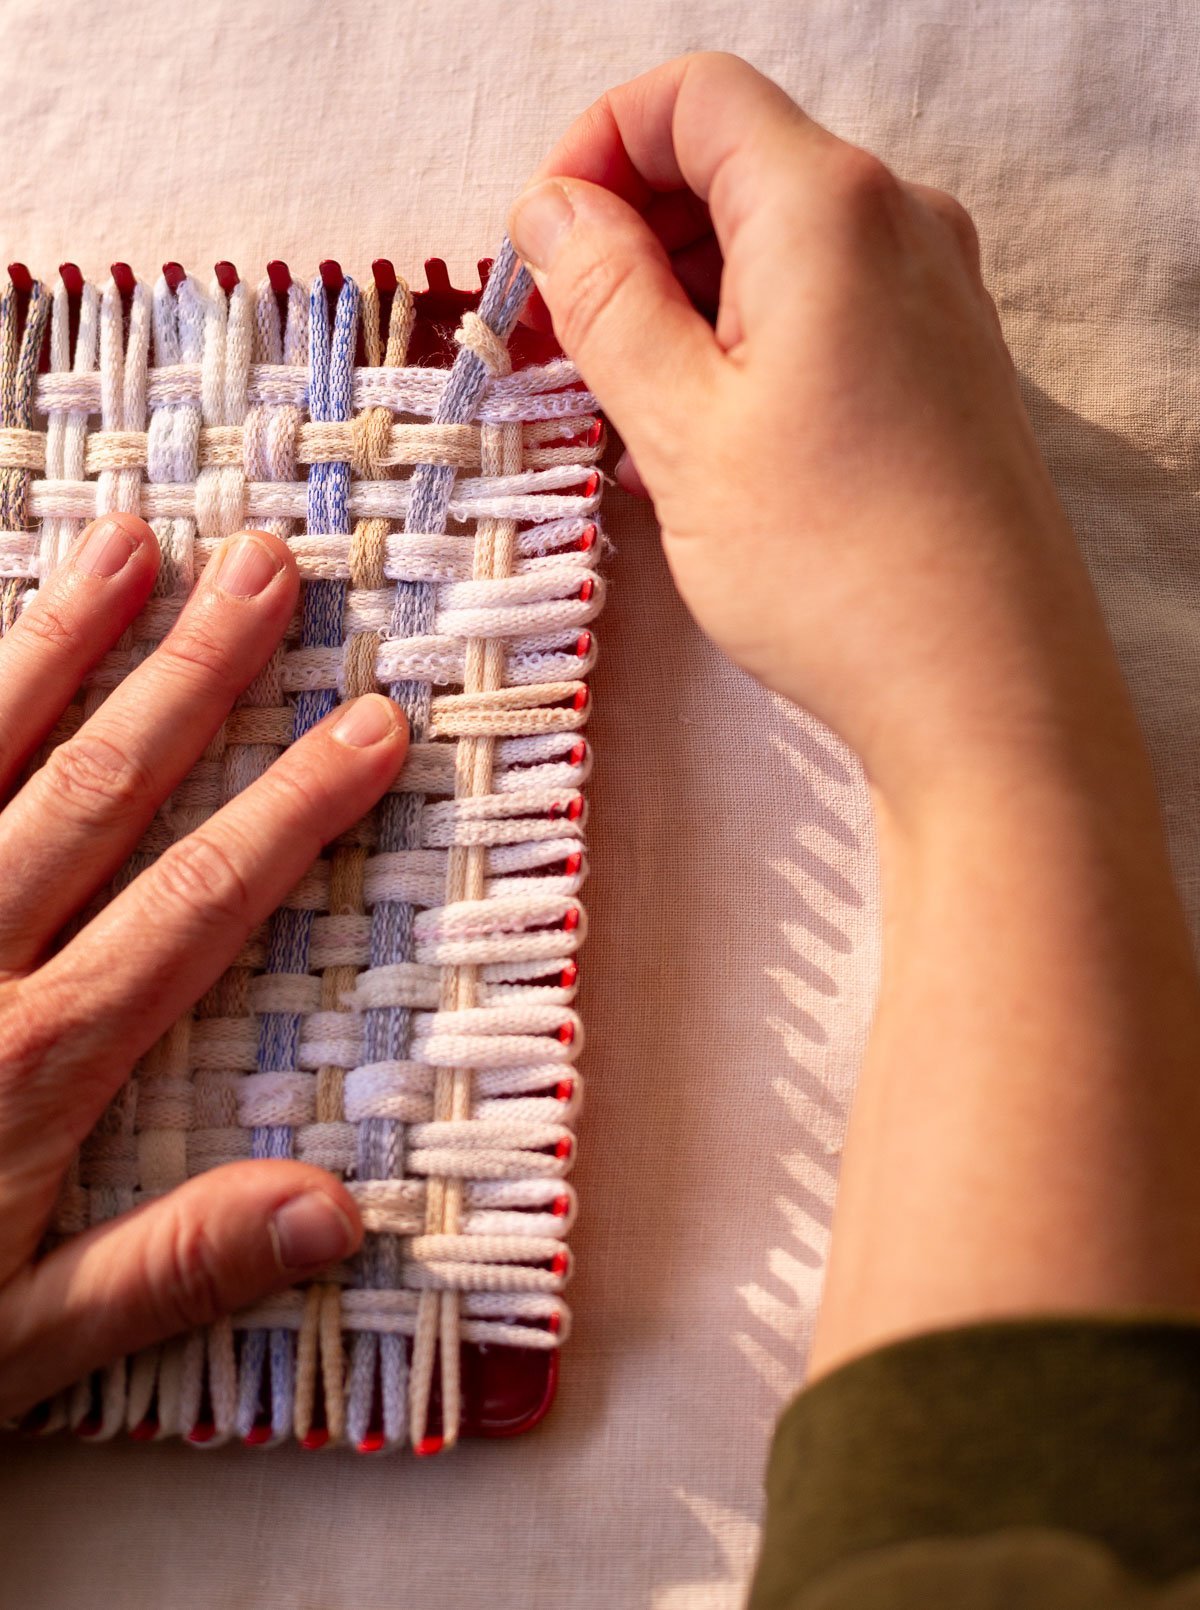
3. Proceed the method, alternating below and over.
For the subsequent loop, you’ll begin reverse no matter you probably did within the first row. So, for those who began the row going over the primary loop within the earlier step, you’ll now go below the primary loop on this second row.
Then, go over the subsequent loop, below the subsequent. Over the subsequent loop, below the subsequent. Identical to in step 2. And connect the tip of the loop to the tip peg.
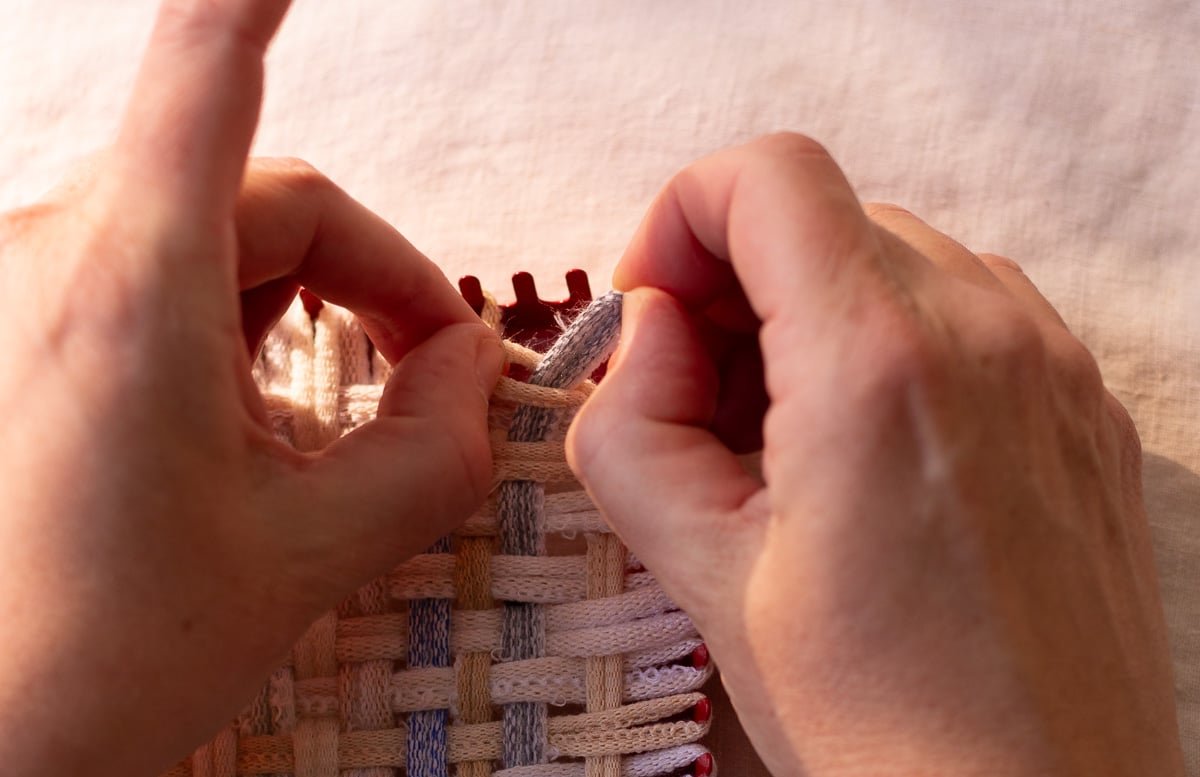
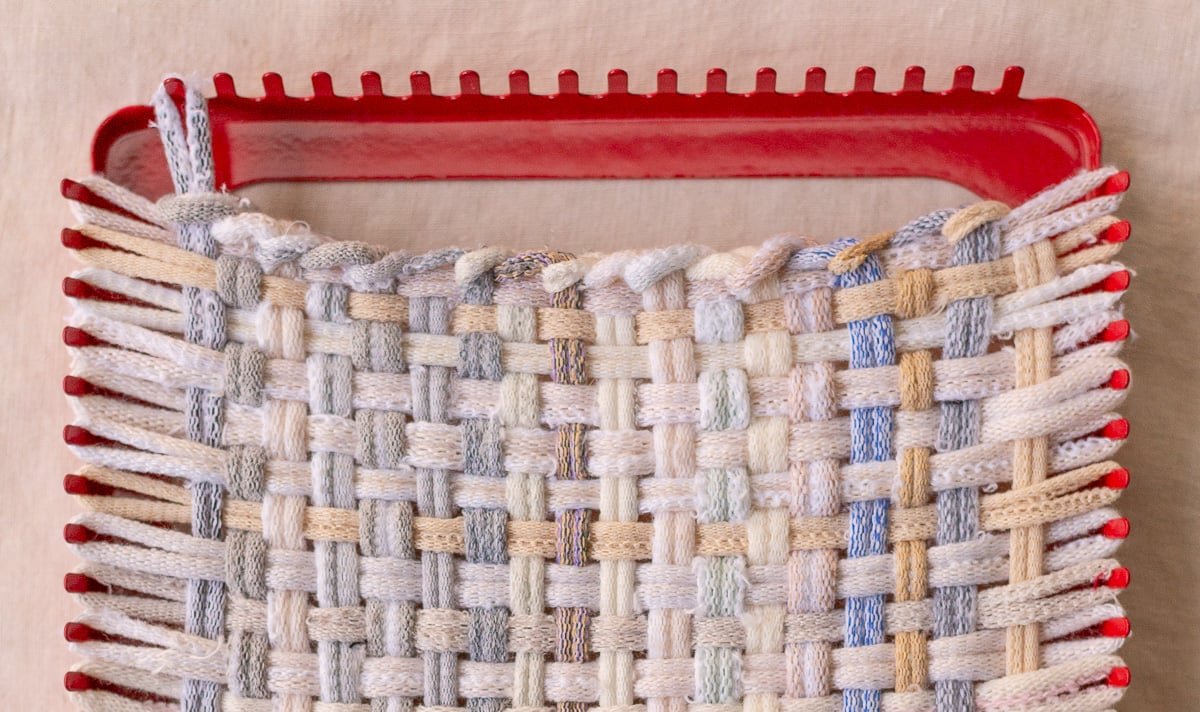
4. Taking the weaving off the loom.
Repeat this technique of steps 2 and three all the way in which down the body of your loom. As soon as the weaving is full, it’s time to take away it from the loom.
Beginning in a single nook, (let’s say prime proper to make it straightforward) take away one loop from the peg. Then take away the loop proper subsequent to it off the peg and put that via the primary loop.
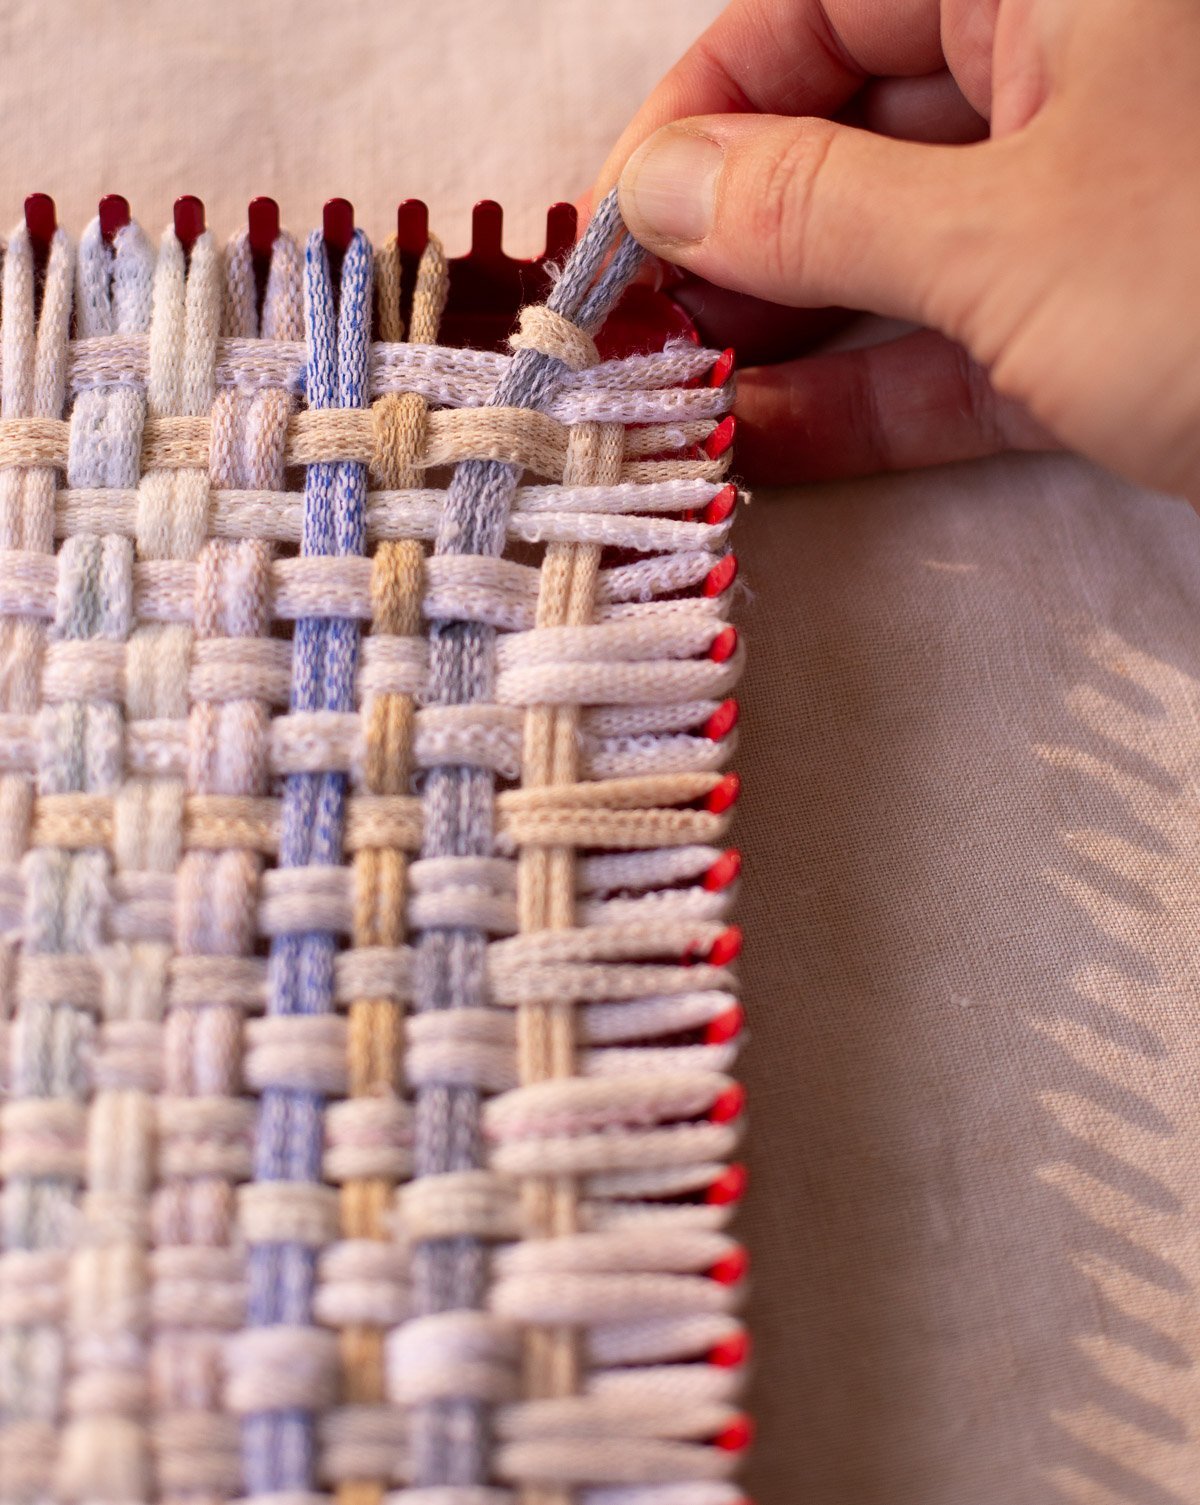
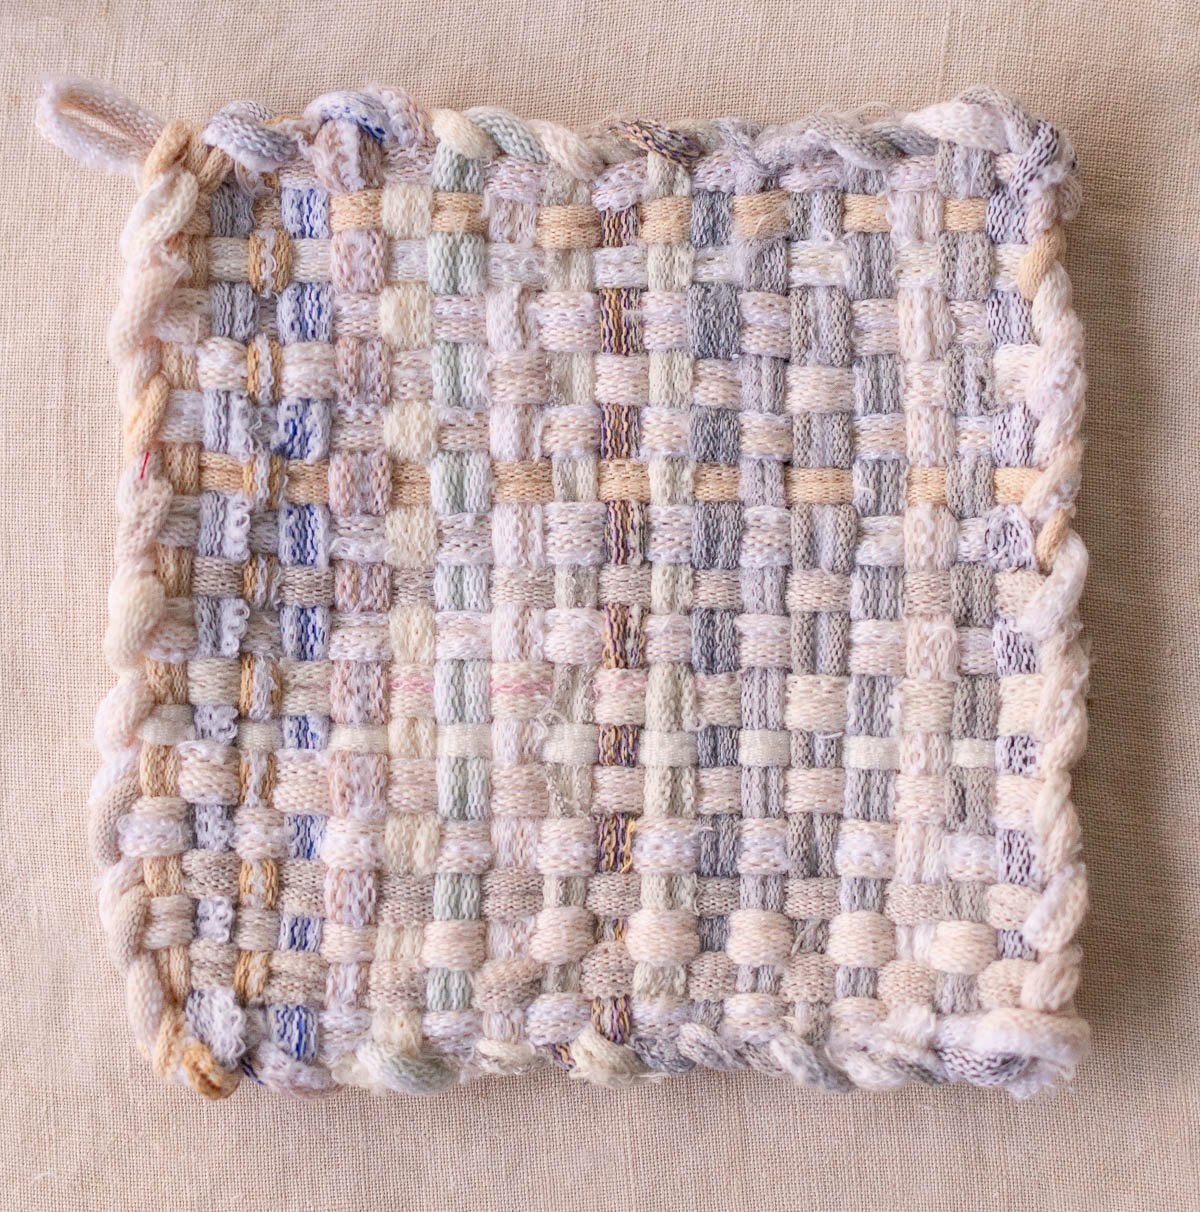
Maintain this course of going for that complete facet, which can kind a braided edge / chain sew.
5. Proceed this course of.
Once you get to the tip of that facet, proceed on with the subsequent facet, placing every loop via the one which got here earlier than it.
Repeat that course of all the way in which round and when the ultimate loop has been pulled via you possibly can stretch any areas again out which are wonky or uneven.
I like creating these useful weavings and I hope you’ll take pleasure in ’em too.
Searching for extra DIY weaving inspiration? Attempt these…
- You may make a potholder with simply your palms (no loom), for a special look.
- Seize some yarn and make a fast cardboard loom utilizing scrap cardboard out of your recycling bin. Quick, straightforward, and works very well for creating weavings (of any measurement).
- Make a extra conventional large-scale weaving loom on a funds.
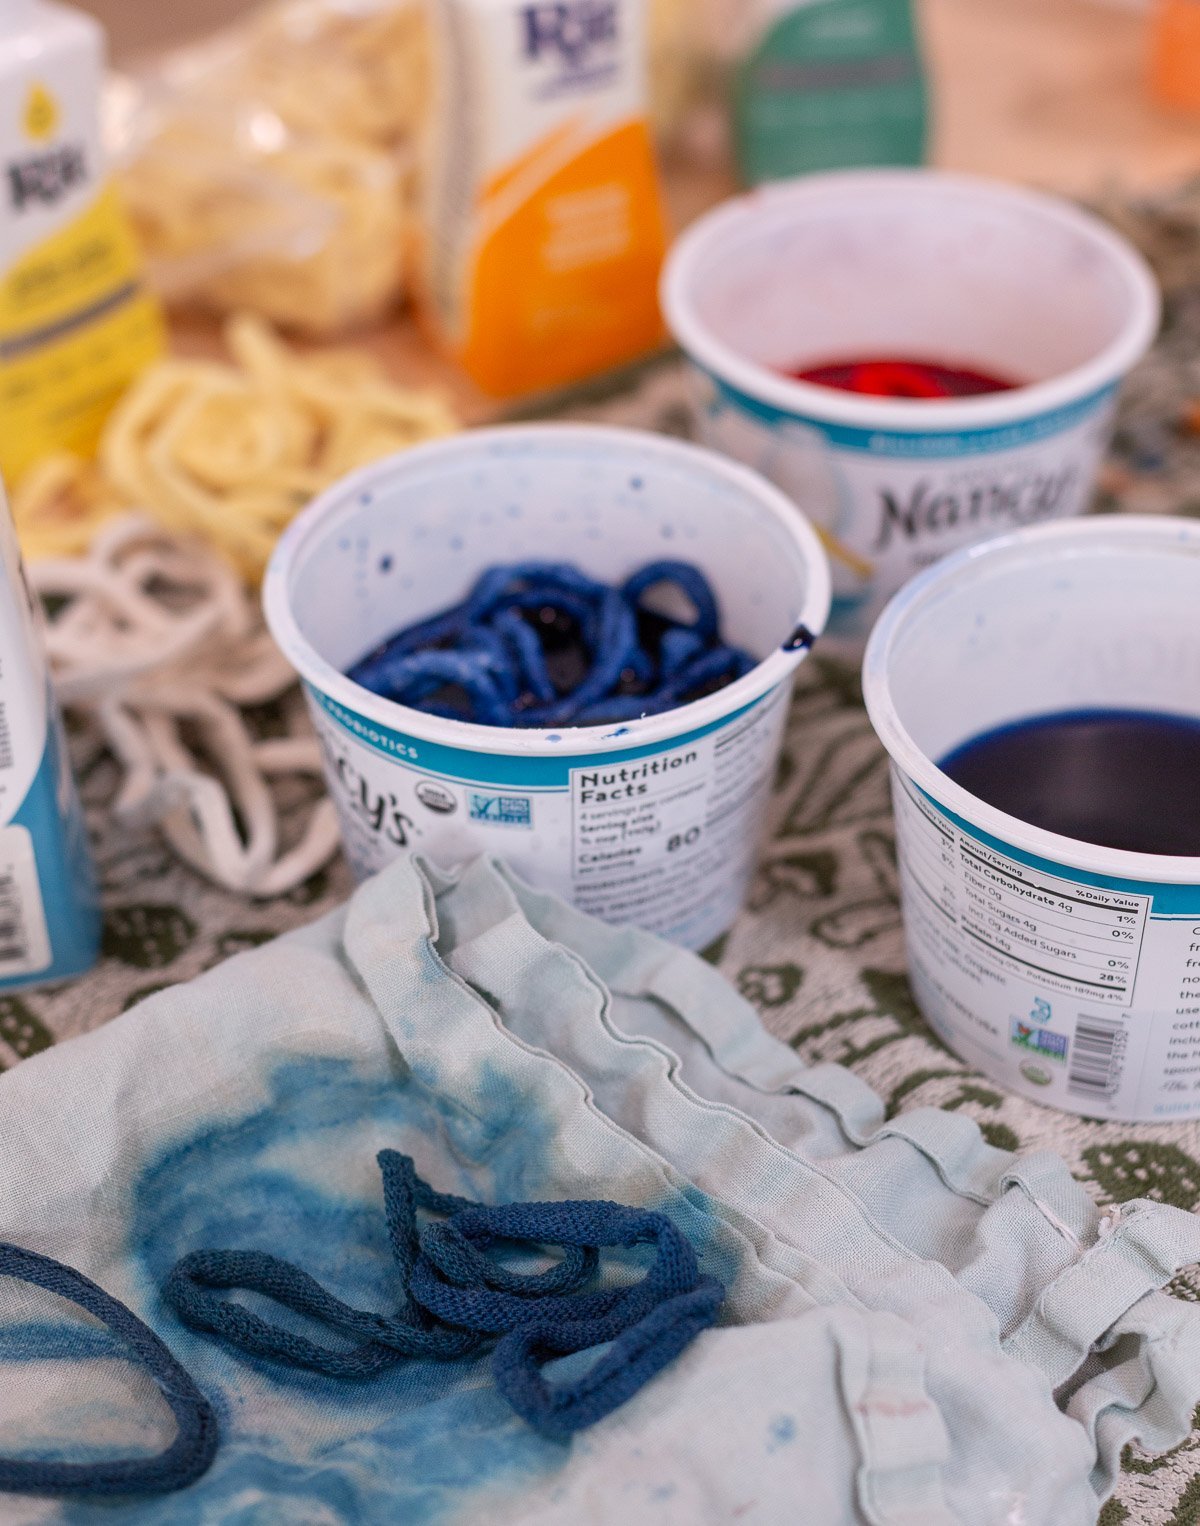
The best way to Dye Loops for Potholder Weaving
The method of dyeing potholder loops is similar as dyeing massive objects, like clothes. The primary distinction is you solely need to boil a fraction of the water you’ll usually use. Which makes it quicker and extra manageable.
- To make use of pure dyes (like avocado and onion skins, take a look at this tutorial for the right way to dye garments naturally.
- For a special look, you possibly can lighten the colour or darkish loops with a reverse tie dye course of, additionally know as bleach tie dye.
- When you’re loops are made from pure supplies, like cotton, and also you need to use conventional dyes, take a look at my tutorial for dyeing material with rit dye.
- And final however not least, in case you are dyeing artificial supplies, like polyester, attempt my step-by-step information for artificial material dye.
Above and under are some loops that I dyed utilizing Rit Dye. The method was straightforward and fairly fast too.

The best way to Make a Potholder
Final time I discussed weaving on a potholder loom, I went via the historical past of potholder weavings, all of the ends of outs of what you would want to get began, the assorted kinds of looms accessible, and so on. However right this moment, I needed to share the right way to really make a potholder weaving for considered one of these looms.
I taught a few lessons on this very topic to elementary faculty children not too long ago (age 4-12) they usually had been capable of grasp the idea fairly rapidly. So you already know the method will probably be easy-to-follow. However extra importantly, its enjoyable, solely requires two objects to get began, and you’ll have a accomplished potholder weaving in lower than an hour.
So, for those who’re in search of a solution to maintain your palms busy and check out a special inventive exercise, or only a mission to zone out on whereas watching television, click on via for the tutorial.
-
Slip your first loop over the primary peg on the prime left and stretch it all the way down to the primary peg on the underside (backside left) of the loom. Repeat this course of all the way in which throughout the loom, ensuring there may be one loop for each set of pegs. And that every one the loops run parallel to one another.
-
Subsequent you’ll create the horizontal a part of the weaving. It is a good time to modify colours if you wish to create a sample. Begin by attaching a brand new loop to the highest horizontal peg (on both the left or proper facet) and go over the primary vertical loop and below the subsequent. Then over the subsequent loop and below the one after that.
-
Sustain with this course of till your loop reaches the tip of the row. Then, connect the tip of the loop to the peg. And also you’re prepared to begin your subsequent loop.
-
For the subsequent loop, you’ll begin reverse no matter you probably did within the first row. So, for those who began the row going over the primary loop within the earlier step, you’ll now go below the primary loop on this second row. Then, go over the subsequent loop, below the subsequent. Over the subsequent loop, below the subsequent. Identical to in step 2. And connect the tip of the loop to the tip peg.
-
Repeat this technique of steps 2 and three all the way in which down the body of your loom. As soon as the weaving is full, it is time to take away it from the loom. Beginning in a single nook, (for example prime proper to make it straightforward) take away one loop from the peg. Then take away the loop proper subsequent to it off the peg and put that via the primary loop.
-
Maintain this course of going for that complete facet, which can kind a braided edge / chain sew. Once you get to the tip of that facet, proceed on with the subsequent facet, placing every loop via the one which got here earlier than it.
-
Repeat that course of all the way in which round and when the ultimate loop has been pulled via you possibly can stretch any areas again out which are wonky or uneven.
Only a heads up that this submit could include affiliate hyperlinks. I make a small fee when objects are bought via my hyperlink.