Neoteck 1″/0.001″ Dial Indicator,Dial Indicator Gauge Full Metal Construction High Precision Tool for Lathe,Table Saw,Workshop and CNC Machining and Automotive Brake Caliper
$23.99


From the model


Neoteck Dial Indicators Set
Neoteck Digital Indicator Set
Neoteck Check Indicator Set
Neoteck Desk Noticed Gauge Set
Neoteck Magnetic Stand Sequence
Neoteck Dial Bore Gauge Set
Neoteck Dial Indicator Set
Package deal Dimensions : 6.77 x 3.35 x 2.44 inches; 7.05 ounces
Merchandise mannequin quantity : NTK277
Date First Obtainable : February 24, 2025
Producer : Neoteck
ASIN : B0DY7VVDGJ
Nation of Origin : China
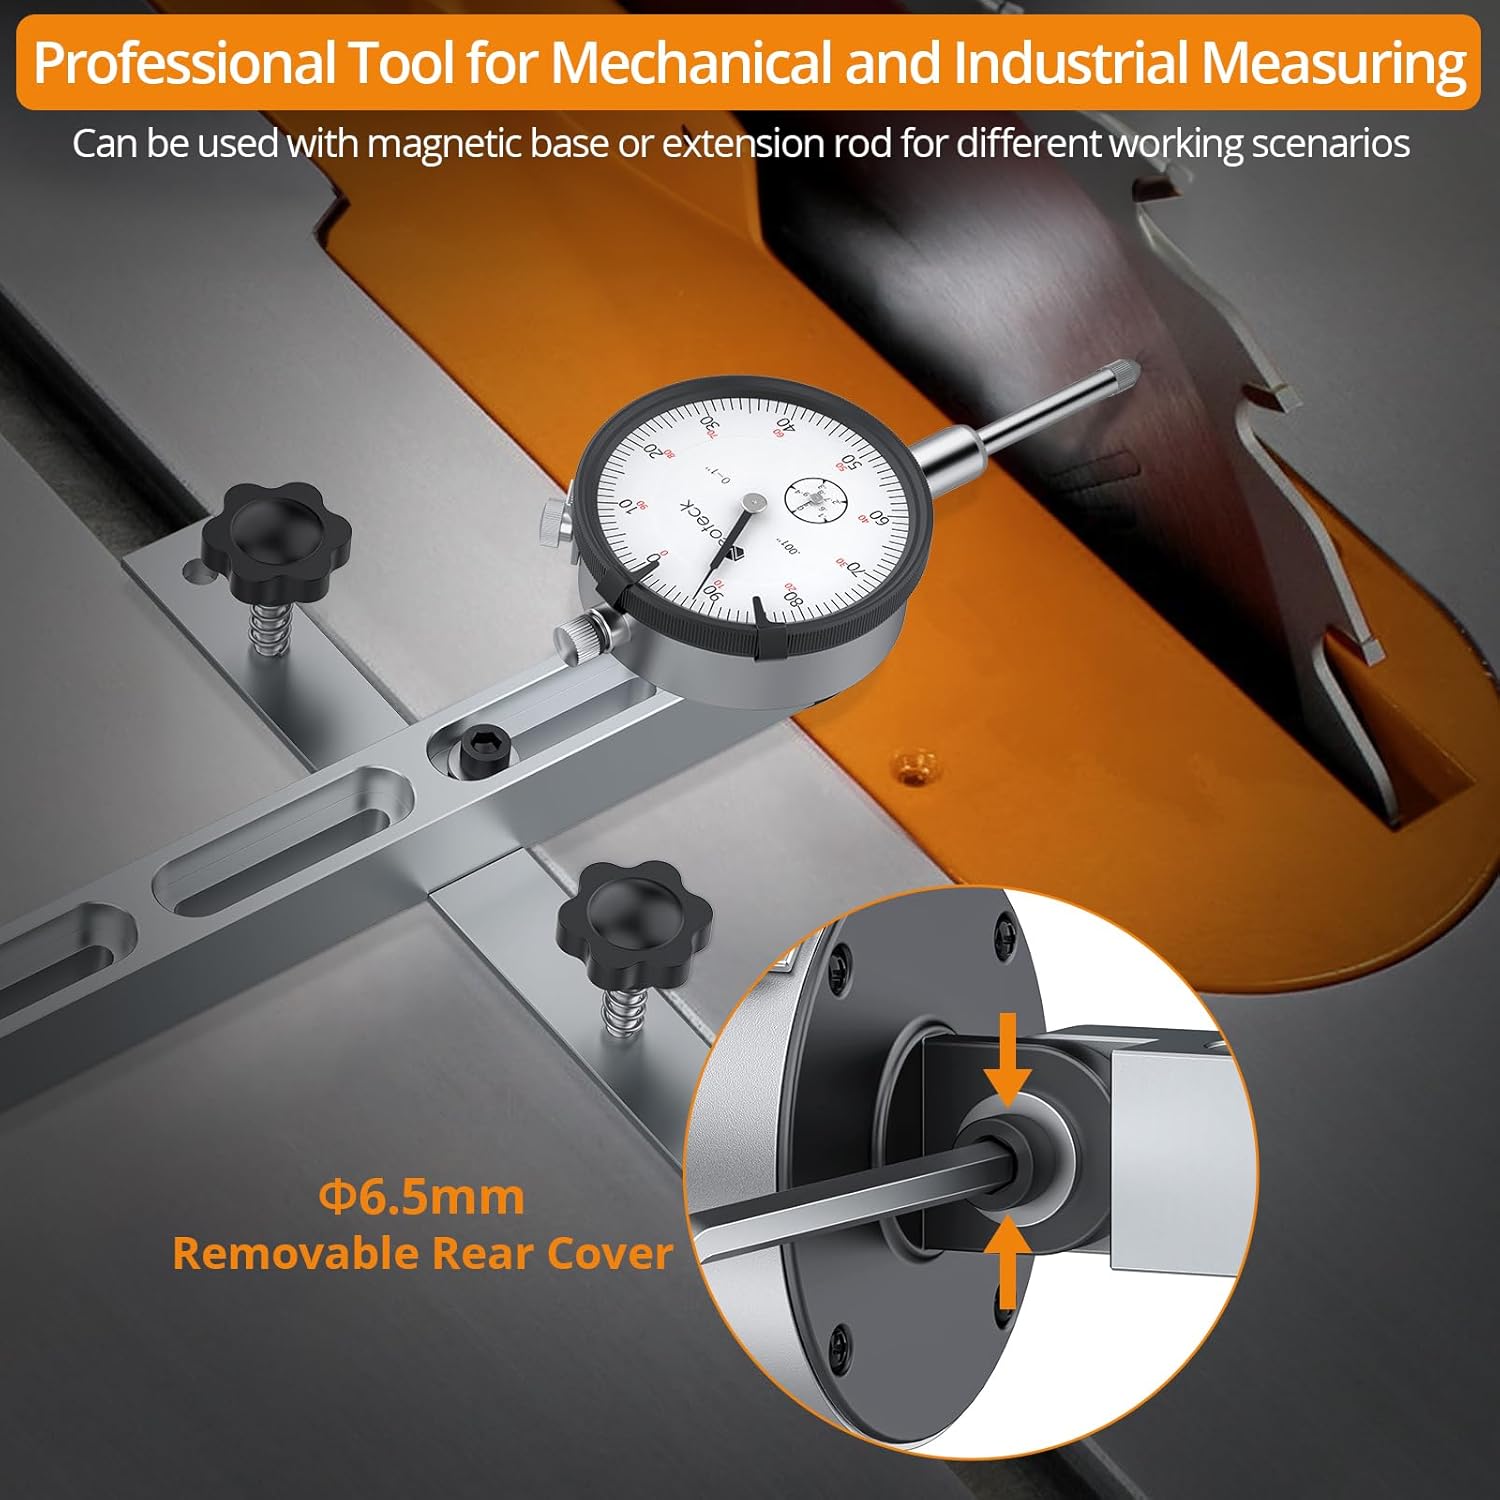
0-1″/0.001″ Excessive Precision Indicator:Neoteck dial indicator includes a measuring vary of 0-1″ with 0.001″ decision for prime accuracy and exact readings.And Every unit undergoes primary accuracy inspection to make sure dependable efficiency,which makes it a super precision measuring instrument for professionals in engineering, automotive, metalworking and woodworking
Full Metallic Development:Constructed with full metallic building,this indicator gauge is designed to supply long-lasting sturdiness and constructed to face up to heavy workshop use.Moreover,the exact inside transmission mechanism(brass insert for the principle shaft/pin)and hardened stainless-steel rack and M2.5 contact level ensues correct and constant efficiency
6.5mm Removable Rear Cowl:With a 6.5mm aperture rear cowl connected, this 1 inch indicator is ideal for simple mounting on a variety of machines.And there are twin mounting choices so that you can choice-flat base or rear cowl included in keeping with your measuring wants
Huge Functions: Neoteck dial indicator is extensively utilized in lathe,CNC machining and woodworking,and so forth.Moreover,with 3/8 inch ( 9.52mm) diameter stem,it’s will be operated with magnetic base,prolonged rod or brake caliper to complete work similar to 3D printer mattress leveling,CNC mill/CNC machine leveling,lathe alignment,desk noticed alignment and brake caliper alignment
4 Fast Steps for Measurements:Step 1:Safe indicator on a secure mount/workpiece with vertical tip contact. Press tip 2-3 instances to remove play. Step 2: Elevate/launch cap to reset needle,loosen bezel clamp knob,align bezel to “0”, then tighten. Step 3: Set tolerance through restrict arms. Step 4: Press tip repeatedly—needle should return to 0.As soon as calibrated, begin your measurements. Learn deviations straight from the dial
")


There are no reviews yet.